Photo Panoramas, a quick ‘how to guide’
My recent trek to Ecuador with Safari Party Adventures as a Photo Specialist gave me opportunities to try out the ‘panorama’ kit I picked up from Really Right Stuff just before I left. Since this was my third time visiting the Andes Mountains, I knew I was going to see some amazing vistas and I wanted to capture them as only a true panoramic image can.
The idea, of course, is to take a series of images that overlap and use the power of Photoshop or other specialized pano software to merge them together into one grand image file.
The ability of current software is impressive. I took a series of shots with a pocket camera some years ago with out a clue as to what I was doing and I got a pretty decent panorama of the mountains west of Milan, Italy.
Now I am better educated and I understand the benefits of careful camera control in creating good panoramic images. If your intended panorama composition has foreground details in addition to the usual background stuff then rotating the camera on the so called “nodal” point is critical. Rotating the camera around a point ahead or behind this point introduces parallax errors and the software can’t create a proper merge.
The nodal point is generally well forward of the camera’s sensor plane, so using the the mount hole on the camera base and rotating with your ball head will not produce good results.
This is easy to prove.
Set up your camera on a tripod reasonably level and with a “normal” focal length setting. Set up so that you have a vertical edge somewhere in the foreground and another farther away such that they can be lined up with each other in the center of your view in the eyepiece. Move the tripod left or right a bit if needed to get good alignment of your chosen verticals. Now, rotate the camera so that the two vertical edges are near either edge of your view. Hmmm… the two vertical edges no longer line up. That’s parallax.
With some trial and error, the pano gear lets you make the rotating point and the nodal point the same which keeps the foreground and background relationships in alignment. When achieved, merges result in perfect images without errors.
I did a fair amount of searching the ‘collective consciousness’ for nodal point information on my camera and lens combinations and was surprised that so little is published. For a given lens, body, and focal length (assuming a zoom), the nodal point is fairly predictable. At the bottom of this post I have listed the distance in millimeters from camera mount hole to the rotation point for a number of lenses and focal lengths. If you have the same gear there is no reason I am aware of why my offsets will not work just as well for you.
In addition to the above, the camera needs to be level and the actual rotating axis must be true vertical.
These special demands have generated a lot of mounting solutions from a variety of manufacturers, but since I had committed to the Really Right Stuff mounting system for my cameras and tripod I was by default rather inclined to go with their panorama gear. There is no downside to this… the RRS stuff is the best and second to none… except for the cost. It ain’t cheap, but it is gorgeous in every functional and visual way. (If you are ‘handy’ and a bit resourceful, a little googling will give ideas on making your own pano gear).


Once the camera and pano gear are all set for the vista you want to capture, you need to turn your attention to camera settings.
Essentially everything goes to manual. You don’t want the exposures and focus changing as you swing to a new part of the view. You won’t like the results and is nearly impossible to fix in post processing. So a short check list…
- Manual exposure. Check several parts of the anticipated pano and pick the best average exposure, making sure you don’t overexpose and lose highlights in any given part of the scene. Take a few test shots. Confirm you have the depth of field you desire.
- Manual focus and (for most lenses) IS (vibration reduction) off. Check focus. (… but it’s easy to forget!)
- Remote release is always best (especially if shutter speed is below 1/focal length seconds). Add mirror lockup if below 1/60.
- Set White Balance to something besides “Auto”, (try “Cloudy” or any other fixed setting).
Composition hints
Include more of the scene than you think you want on all four sides. The merged file will have scalloped edges and the corners will be pulled in. In the process of cropping the image to straight sides more will be cut away than you would think and you may not be able to get the final image you intended. I have found the best way to deal with this and keep the focal length I want is to shoot with the camera vertical. This means more individual images to get the panorama you want to capture, but the software is doing all the work so what’s a few more shots?
Overlap each shot with the previous by approximately a quarter. I changed my view screen in the 5D to the one with vertical and horizontal lines on it… a great aid for noting “targets” in the view. An object on the left hand line I set to the right hand line when I swing the camera. Any approximation is fine. I ignore the very nice engraved degree lines on the RRS pano head, but I could use them if I wanted to. (Who wants to count degrees when trying to capture an amazing scene?!)
Some folks have advocated shooting panos in jpg and / or at a reduced resolution if your camera offers it on the theory that you are combining images and will get lots of resolution in the final product. I, however, subscribe to the school of “don’t throw away good image data”. You may find later that one of the shots will make a nice image by itself. Also, I shoot RAW. Period. Shooting jpg is like taking off in a plane with less than full gas tanks. Why limit your options?
Yes, the merged image will be a big file. So what? You can make it any size you want in post processing.
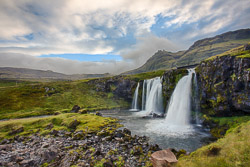
 Five images combined, volcanic lake, Quicocha Lagoon, Northern Ecuador
Click on image for larger view
Making panoramas is great fun and it will add a new perspective on how you view the world. Give it a try, (even without the panorama gear)… you might be surprised!
One last reminder… don’t forget to reset your camera to your “normal” settings after shooting your panoramas. It is very annoying to miss a great spontaneous shot later because the focus was still on manual, IS is off, and the mirror lock up is still engaged!
My Offsets for Canon 5D or 1Ds3 and the following Canon lenses:
17-40 @ 40mm, 132mm offset (OS)
24-105 @ 24mm, 110mm OS, @ 50mm, 105mm OS, @ 70mm, 80mm OS, @ 105mm, 50mm OS
70-200 @ 70mm, 47mm Os, @ 100mm, 5mm OS forward, @ 135mm, 16mm OS forward, @ 200mm, 4mm OS